
![]()
Anyone who has served in the military has probably heard of Gunnery Sgt. John Basilone who was born to be a United States Marine. Basilone enlisted in the United States Army in July 1934 and completed his three-year enlistment with service in the Philippines. After he was released from active duty, Basilone returned home and worked as a truck driver in Maryland. After driving trucks for a few years, he wanted to go back to the Philippines and believed he could get there faster by serving in the Marines, rather than in the Army.
In 1940, Basilone enlisted in the Marine Corps. The Marines sent him to Guantánamo Bay, Cuba for his first assignment and then to Guadalcanal in the Solomon Islands as a member of “D” Company, 1st Battalion, 7th Marines, 1st Marine Division.
On the night of October 24, 1942, in the jungles of Guadalcanal, Sgt. Basilone was commanding two heavy .30-caliber machine gun sections that were tasked with holding a narrow pass at the Tenaru River.
As the Marines dug in for the night, a Japanese regiment numbering 3,000 men attacked the line, slamming the Marines with grenades and mortar fire. The small teams of Marines fought off the attacking forces until one of the Marine gun crews was disabled by enemy fire.
 Putting his life directly in the line of fire, Basilone carried about 90 pounds of weapons and ammunition to the damaged gun pit. He ran a distance of about 200 yards through enemy fire, encountering Japanese soldiers along the route, who he killed with his 1911 pistol. Basilone continued running back and forth between gun pits, supplying ammunition to those in need and clearing gun jams for his younger Marines.
During the battle, Basilone lost his gloves, which were critical for holding and swapping out the scalding hot barrels of the heavily used machine guns. Without hesitation, Basilone barehanded the searing barrel of his machine gun and continued putting rounds downrange, killing an entire wave of Japanese soldiers and burning his hands and arms in the process. According to accounts, enemy bodies were piling up so rapidly that other Marines had to move from their defensive positions to knock over the growing wall of flesh so they could reestablish clear fields of fire.
In the end, an entire Japanese regiment was stopped by the gun crews, and by the time reinforcements arrived, only Basilone and two other Marines were left standing. Basilone would go on to be awarded the Congressional Medal of Honor for his actions in Guadalcanal. He returned to the U.S. as a hero and was given the chance to spend the rest of his career in Washington, which he turned down.
On February 19, 1945, Basilone stormed Red Beach on Iwo Jima. Pinned down by enemy machine gun fire, he led his gunners up the steep sand hills. Moments after destroying a Japanese blockhouse, Basilone and four members of his platoon were killed when an enemy artillery shell exploded. He was 28 years old. Basilone was an amazing American Hero. He did anything and everything to serve his country and protect his men, which was shown by how he sacrificed burning his hands on the machine gun to stop the Japanese.
These days, tactical/shooting gloves are standard for members of the military and for many in law enforcement. The question is, should tactical gloves be part of your bug out gear and are there any downsides?
First, the obvious reason for wearing any sort of glove is to protect your hands. For our military members, they often wear gloves that are flame-retardant to protect them from an IED explosion. While you may not need the same level of protection, tactical gloves can keep your hands safe during long training days when you shoot hundreds of rounds. What I mean is, I’m sure anyone who trains a lot has been “bit” by their slide or experienced other minor hand injuries where gloves could have protected them or even saved your thumb when reloading.
 Another reason for gloves can be illustrated by my personal experience. I can tell you that I have been shooting in extreme desert locations, which I cannot name, where the temperature was over 100 degrees and picking up a gun without gloves could easily burn your hand.
The biggest downside to wearing any sort of glove when shooting is that you must train with them on a regular basis. The problem is, if you don’t train to shoot with gloves, and you put them on one day to go training in the snow, chances are your accuracy will be affected. The good thing is, when you train with gloves and then you shoot barehanded, it typically is easier to shoot.
Considering that tactical gloves could be a big bonus in a crisis situation, I want to share with you some options you may wish to consider…
Blackhawk S.O.L.A.G. Whether it’s water, chemical, or perspiration moisture, these gloves will keep you protected. The gloves are made with premium English goatskin leather. The dual palm layers offer up to 25% more abrasion protection than average gloves.
In addition, the seam placement on these gloves was well thought out with joints receiving added support. These gloves are not touchscreen device compatible. However, they are cut, abrasion, flash and flame resistant.
Mechanix Wear M-Pact. Mechanix gloves have been around for a long time and the company’s name is synonymous with quality. These gloves feature a synthetic leather palm, which adds to the longevity of the gloves that have a history of standing the test of time.
Mechanix tactical gloves are very well-suited for hot and humid climate use. Hand perspiration is not a problem for the wearer. In addition, these gloves offer an ideal range of motion with attention to detail for the dexterity of the index finger, allowing for better movement within the trigger guard.
One of the cool things about these gloves is the unique fabric pattern that allows the wearer to hide in plain sight. In short, traditional patterns utilize a contrast effect in an attempt to disguise the wearer. Contrast camouflage is not nearly as effective because in close range, a low-resolution design will look unnatural and highly pixelated against most backdrops. This glove pattern does not contrast, it blends.
5.11 Tactical Hard Time. Tactical Hard Time gloves were designed with military, law-enforcement and tactical operators in mind. What sets these gloves apart is their thermoplastic knuckle plate design. The knuckle ridges feature a raised, hard design that is split in the middle of the hand to allow for more natural movement and hitting, should the need arise.
The goatskin leather is comfortable and long lasting. The backhand of the glove is made of kevlar so you are getting slash, burn and cut protection with these gloves. These gloves are the top of the line for those who want the best.
The reality is, tactical gloves can definitely keep your hands safe in a crisis situation and I definitely think you need gloves in your home, car and bug out bag.
![]()
Before I was sent on a counterterrorist mission to a country embroiled by violence, crime and smothered by oppressive poverty, I received special training on “Concealed Carry”. Successful concealed carry requires an understanding and implementation of four major elements: 1. Strategic Deception, Misdirection, and Distraction 2. What to conceal 3. Where to conceal it 4. When to use your concealed items.
For your concealed items to remain concealed, it takes more than just hiding them on your person. You will need to start with deception – appearing to be non-threatening, meek, easily intimidated and basically emotionally and physically incapable of taking the risk of concealing anything. Phase two involves having something pre-positioned on your body that appears as though it is something you are trying to conceal.
Perhaps for your misdirection you “attempt to conceal” a letter from your lover that you do not want your spouse to find. It really does not matter what you use, the point is to make someone searching you believe that they have found your most secret and protected item “hidden” on your body. Now that they have your nefarious item in their hands, the distraction begins.
Immediately begin to make a big fuss about the item. Depending on the situation, such as whether you are going through foreign customs or stopped by local militia, you can yell, become physically agitated, try to run, or whatever over-the-top reaction suits the environment. This helps to stop further intensive frisking.
Now that you understand the active phase of genuine concealed carry, it’s time to examine what we really need to carry concealed. A brief mental experiment will reveal to most people the items they need, which are items with information, valuables, or “minor advantages”. The first two are pretty easy to envision. You may need to conceal and protect information on a thumb drive or a small sheet of paper. Your valuables might be precious metals, diamonds or large denomination currency.
“Minor advantage” items need explaining and they are things that everyone should genuinely conceal. Here is a list that I concealed on my body when on operations: A razor blade, floss, pencil lead, write-in-the-rain paper, a water proof match and a few Uncle Sam specials that must remain unspoken. If I were detained for any reason by anyone, I would want to have these items on me to aid in my survival and escape.
 Here is where I carried each of these items on my body. I had my razor blade sewn into the front of my shirt collar where it was unobservable and where no one is likely to frisk. I had three feet of waxed (in case I had to use it for kindling or a garrote) floss sewn into the hem of my left pant leg. I had two, one-inch pieces of pencil lead sewn into the cuff of my shirt along with write-in-the-rain paper filling each cuff like a cuff stiffener. I had the all-weather match sewn into the hem of my right pant leg.
Notice that we do not conceal any “survive and escape advantages” in our shoes. We know that it is common practice for abductors to remove shoes from western abductees.
The next vital step is to know when to use your concealed minor advantages. While there is no formula or hard rule, it is critical that you take the necessary time to assess your environment, study the number, patterns and personalities of your abductors and gather as much intelligence as possible.
Then you need to develop a plan and decide if that plan will likely afford you a reasonable chance to escape. Once you show your cards, you either win or lose, but either way, the game is over. My recommendation is that you select the few items that you feel require genuine concealment and choose an outfit to sew them into. That way, if the time comes, you can quickly don that outfit and be ready for what’s coming your way.
![]()
 Impeachment will no doubt fill the news cycle for a while to come, but what does this mean for gold and gold coins? Well, with the Democrats taking the first step to file articles of impeachment against President Trump, we need to look at the last two times a Democratic Congress filed articles of impeachment against a Republican President. The first time was in 1974 with President Nixon.
Stocks collapsed sharply and gold soared. The Dow fell from 1051.70 on January 11, 1973, to 577.60 on December 6, 1974, down 45% in just under two years. That coincided with one of the biggest bull markets in gold and rare coins. Gold tripled from barely $60 to nearly $190. The bulk of the stock market decline came in the third quarter of 1974, during the time leading up to President Nixon’s resignation and then President Ford’s pardoning of Nixon.
In that inflationary environment, bonds were called “certificates of guaranteed loss,” cash was losing ground, stocks were losing 45% in nominal terms and falling twice as fast in real (after-inflation) terms. At the same time, the Fed was raising interest rates to new postwar highs, raising rates nine times in 15 months, from 4.5% to 8.0%. Gold was one of the only investments going up, but it was illegal for Americans to own gold until the final days of 1974, when the 41-year-old law was finally repealed.
As gold kept rising, many U.S. investors turned to numismatic coins. From 1972 to 1974, many rare coins rose far more than gold or silver bullion alone. For instance, the Rare Coin CU 3000 index rose 348%.
In 1987, there was a less-successful threat of impeachment against President Ronald Reagan. On March 6, 1987, Representative Henry B. Gonzales (D-Texas) introduced articles of impeachment against President Reagan regarding the Iran-Contra affair. There were hearings running three months – from May 5 to August 6, 1987, including testimony by Oliver North and others, followed by Congressional Committee meetings investigating Iran-Contra through the fall. The impeachment threat wasn’t over until the final committee report came out in November, after a huge 36% stock market crash! At the same time, we saw the beginnings of a bull market in rare coins. From 1986 to 1990, the Rare Coin CU 3000 Index rose 665% at a time when gold bullion and stocks were essentially flat.
The bottom line is, it pays to invest in both gold and rare coins when impeachment threats are in the air. It never pays to wait too long, since stocks can fall very fast – and coins can rise very fast – in times of national uncertainty, such as we are in now. [Publisher’s Note: For questions about buying gold and silver coins you can contact Forest Hamilton directly at foresthamilton@universalcoin.com or call 800-822-4653. Please know, if you purchase any coins from Forest, we don’t receive any compensation from him. We simply know he’s one of the good guys in the business that can be trusted.]
![]()
Of all my years in the US Army, a skill I learned and used many times to save to my butt out in the field and on combat missions was “jerry-rigging” equipment so that it continues to function after it breaks down. Some folks may call it “MacGyverism”, simple “redneckery” or just plain old fashioned “unbreaking it.” In any case, it’s a skill that has literally saved me multiple times in combat.
I remember during the 1991 Gulf War, we were speeding north in my Humvee towards our objective when a severe sand storm hit. We couldn’t stop as we were spearheading an entire Combat Brigade of the 82nd Airborne Division behind us and the entire battle plan hinged on my Motorized Recon Platoon pathfinding the way.
 Once the storm hit, I remember my driver having a lot of issues seeing what was in front of us. We kept on driving as best we could when all of a sudden, we heard the sound of god-awful crashing and snapping all around us. Once the dust settled, we realized we had driven through a poor family’s goat farm, straight through their adobe structure, fencing, and hay shed. The front of our vehicle was badly damaged with steam flowing out.
My driver, thankfully selected for his mechanic ability and country boy ways, lifted the hood and said, “Sarge, we got a problem!” I looked at what was going on and saw that one of the hoses was badly pierced. My driver quickly grabbed some electrical tape and I spit a huge glob of chewing gum in my hands. We stuck the gum over the hole and put several wraps of the tape around the issue, and “abracadabra” we were back in business. We unattached the severely damaged hood, left it behind and continued on with the mission. We said goodbye to a very upset farmer, who was later taken care of by the pay officer. The truth is, I reused this very same skill countless times throughout my military career and carried it over into my everyday life.
I have found this “jerry rigging” skill particularly useful out on an expedition or mission when the edge tool that I was relying on had its handle break. This was the case when my partner and I were on the Serengeti Plains in Tanzania, Africa. I was batoning some much needed foot wear off a tree when the handle of the knife I was using had the end break off. It was a rat tail handle design covered in a thick leather hide which held the now cracked rat tail handle together, but the leather grip kept trying to work its way off as I used the blade.
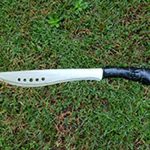
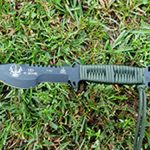 We were surviving in a very tough environment and I didn’t want either of us to get hurt. I had no duct tape or paracord on this mission or any other supplies for that matter, only the natural resources of my surroundings. We found some pitch off a tree that was quite gummy, but once it dried, it became very hardened. I applied some on the end and let it sit out on a rock in the 115-degree heat and in a few hours, it was good to go. After this experience, I have become a huge fan of fixed blade knives because handle repair and overall knife integrity is much better and a lot easier to fix than other types of knives.
One must always be ready to make a repair in the field and use their wits to do it, regardless of the blade they have chosen to bring to the field, whether it is a fixed blade, folder, rat tailed, or another tool. One must be ready to always put their wits and “MacGyver” skills to the test, if you want to make it out alive, or at least get home in time for the wife’s home cooked meal. Here are a few methods I have used in the past.
- Duct Tape is every red-blooded American man’s friend. Some say it’s the cure for every repair in the world. All one needs to do is simply keep wrapping the tape around the handle until you get to the thickness you need. It’s also very pliable, which lends itself to helping shape the new grip to your hand or the ergonomic design you want. This will cut down on hand wear. I have even used pieces of cloth or found foam to pad the handle some before wrapping it.
- Cloth is something readily available, whether it’s torn form your shirt, a pack towel, or even one of your socks. It just has to be tied very tightly so it does not come loose.
- Paracord is a great way to wrap a handle as it provides not only comfort and grip, but if you need some cordage, its right there on your knife for easy access.
- Carved bone and wood handles make excellent replacement grips and handles. Once you have carved and shaped them to the desired length and thickness, you will need to fix them to the blade handle in some way, whether by using screws, an adhesive, or even tree pitch in a pinch. The other method here is to take a whole piece of bone or wood and bore in a center cavity for insertion of the handle. This method works great for rat tail handles.
- In some cases, a new handle may be needed altogether. Simply cut two pieces of wood that mirror each other in design and then sandwich at least a third of the blade between the two pieces of wood. Then use either duct tape or cordage to very tightly secure the blade in its new handle home. This technique is also very good if you must make a knife from a piece of bone, shell, rock, or metal you have found. You can find this technique being used all over the world today by many people as a learned practice from ancient times.
These techniques do take a bit of practice to work, but as I stated in my opening dialogue, this skill has literally saved me time and time again when I needed it most. It once again goes back to the old adage, “If there’s a will there’s a way!”
![]()
Recently, I was being interviewed on camera in San Diego about what it takes to get healthy. The interviewer kept asking me about all the cool new hacks and fads. I kept coming back to the basics because that is ultimately what is the most important.
There are three basics that accomplish three goals. You already know the three goals from last month – decrease inflammation, decrease oxidative stress and improve immune system function. What are the three basics? Sleep, nutrition, and exercise. If you master those three things, you will master your health.
This month, we’re going to talk about the nutrition piece. Back in the 1960’s, the federal government teamed up with the USDA and developed the food pyramid. That was the day we all started getting sicker and larger as Americans. Companies also started manufacturing a ton of “junk food” such as TV dinners.
 The problem is, all those carbs and artificial food additives increased our insulin levels, kept us hungry and made us gain weight and develop diabetes, hypertension, and cardio/cerebrovascular disease. The other problem is that the USDA as well as beef/poultry/pork farmers began to fill their animals up with hormones and antibiotics to them bigger faster and keep them producing eggs, milk or meat as quickly as possible. The issue was that whatever the animals ate and were injected with is exactly what we ate.
The food pyramid should be turned on its head and the federal government is finally catching on to what many of us physicians have been saying all along. Fewer carbs and more fats. Though it’s great to eat for pleasure, our focus should be on eating for fuel. We eat clean to limit the effort and energy our body spends on detoxifying itself through our lungs, liver, and kidneys.
You’ve probably heard about intermittent fasting. Why do it? Three reasons. First, we were never meant to graze continually like cows do. We were meant to eat, then work, create, hunt, run and sleep. Our bodies are not designed to handle a constant influx of calories. Secondly, there’s this thing we call an “insulin window”. Insulin is a hormone produced by our pancreas that helps glucose traverse our cell membranes through something called active transport. Without it, glucose can’t get into the cell and the cell either struggles to function or has to adapt and resort to an alternate fuel source.
The problem is that insulin is pro-inflammatory and is a growth-like hormone. In other words, while it’s pumping out, it creates inflammation and it causes us to get bigger and fatter. In fact, it’s impossible to lose weight while insulin levels are high. So, the idea is to produce as little insulin as possible over as little time as possible by limiting the time each day that we take in calories (eat).
So how does this look? For me, for example, I’ve never been a breakfast eater (my mom always hated that), so I start getting hungry around 10 am but can usually hold off till 11 before I eat lunch. Then I try to eat dinner around 6 pm with a snack in midafternoon around 2 or 3 pm. That gives me a 16/8 daily intermittent fasting schedule. If I want to tighten up, I’ll decrease my window to 6 hours and stick to an 18/6 schedule. If you get hungry outside of that, water, a low carb protein shake or energy bar is okay. Perfection isn’t the goal. 80% compliance is. More on this to come next month.
![]()
I recently looked at one of my self-defense classes, which displayed an array of different types of people. Some were big, some were small, others tall and others short. I had both males and females in the class with varying occupations ranging from law enforcement to stay at home moms, executives to blue-collar workers. I taught them all the one move you must have in your self-defense arsenal.
It’s a simple move that will affect anyone, regardless of their size, gender, strength level or even pain tolerance. I asked everyone in the class what they thought it was, but nobody gave the right answer.
“It’s the eye jab”, I told them. Jabbing someone in the eyes is the one move that can literally disable any attacker with the least amount of movement on your end. Now, how you do it is very important. But first, grasp what I just told you. A quick eye jab can disable anyone regardless of how strong or big they are. There are few self-defense moves that can claim that label.
Bruce Lee even built his “Jeet Kune Do” combative theory around this elusive move. Lately, we’ve seen unintended eye jabs being used “too effectively” in mixed martial arts fights, as they have now been outlawed and come with hefty penalties. If this simple move can take down highly trained MMA fighters, I think it’s something that everyone should take a serious look at.
Performing an eye jab is easy, but that doesn’t mean that you and I don’t need to practice it. The steps to complete a successful eye jab are: First, stand in a bladed stance with one leg in front of the other. (Such as a boxing type of stance.) Next, use your front hand (ideally your strong hand, as it is stronger and more coordinated and it is closer to the target.) Then, flick out your arm, “whipping” your hand and fingers at the eyes. This is not like a “karate chop”, nor should you be “pecking” at their eyes. Simply snap out your fingers like you would snap out a rolled-up towel. Another way to think of this is a snake attacking and how a snake quickly strikes out at its victim.
If you don’t have a heavy bag or even a partner to train with, hang a piece of paper from the ceiling and snap out eye jabs to develop your distancing and timing. Although one good eye jab can take down the most hardened attacker, it is important to also have a couple follow up moves ready to go, such as a front kick, elbows and knee strikes. But, certainly don’t dismiss the simplicity of an eye jab, because it can do serious damage to your attacker and give you a chance to escape to safety.
SAVINT
Your Monthly Savings Intelligence
By Jason Hanson
 It’s that special time of the year where we open registration for the Ultimate Spy Week and you can take advantage of the early-bird special for big savings. Make sure and read the insert that was included with this month’s newsletter. You can also visit www.SpyWeek.com for complete details. Please give us a call at 435-572-4432 with any questions you have about Spy Week. I hope to see you there!


